Monday, February 9, 2015

Interesting Ideas for Flower Planters


We all have flower pots sitting here and there with our favorite plants growing in them.  You can buy flower pots in many different colors and sizes but have you ever wished for something that would match the flavor of your landscape, something unique and original?  Here are some ideas for planters and flower beds that you may find to be just the creative touch you are looking for.
In my yard I have an old wheelbarrow where I have planted canna lilies for the past few years.  I also have an old wicker chair that serves as a plant stand placed in front of a poplar tree to give the plant shade.  An old sand box is now a flower bed for tulips, hyacinths and hostas.  Along the edge of my yard is a terrace wall that divided my grandfather’s cornfield from a field of black-eyed peas many years ago.  Now it serves as a border around the yard where I have planted a multitude of old-time shrubs and flowers from my grandmother’s yard that are very difficult to find anywhere else.  They grow well along the terrace among the dogwood trees and moss. 
 
Near the front steps we have an old utility sink filled with potting soil where I plant annuals in the summer and kale in the winter.  Kale stays green all winter and has pretty stems – some yellow and some red.  Before putting the dirt in the sink I placed several layers of newspaper in the bottom to cover the drain hole and keep the dirt in.  Water can still drain through the newspaper so the sink doesn’t fill up with water. 
An old pair of tennis shoes or worn out work boots containing snapdragons, marigolds or some other annual with pretty blooms would look nice sitting on either side of your front steps or on your porch or patio.  Even a house plant that can be set outside in warm weather would add a cheery green touch to an old boot!  A boiler or other deep pot from your old set of cookware makes a great home for columbine or foxgloves. 
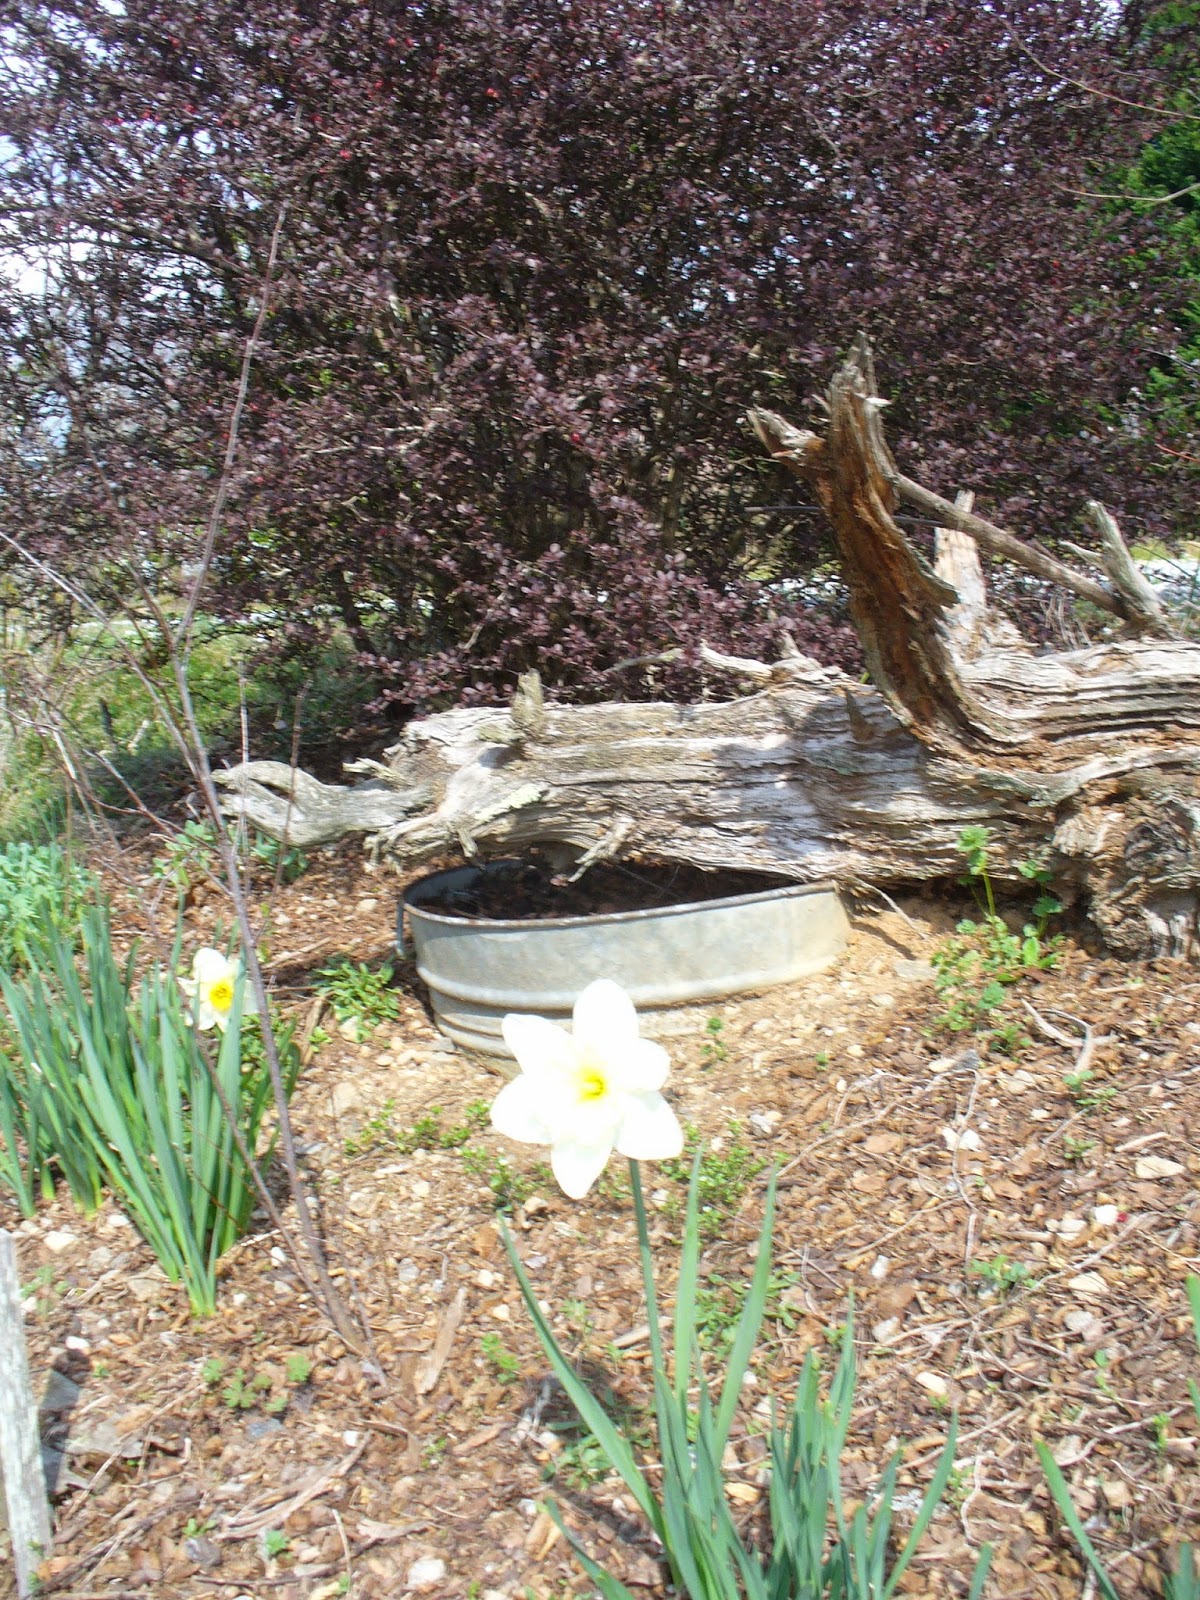
At one end of our yard there is a tall cedar tree and underneath it are several very large rocks moved from different places to make a circle at the base of the tree.  These rocks serve as interesting 
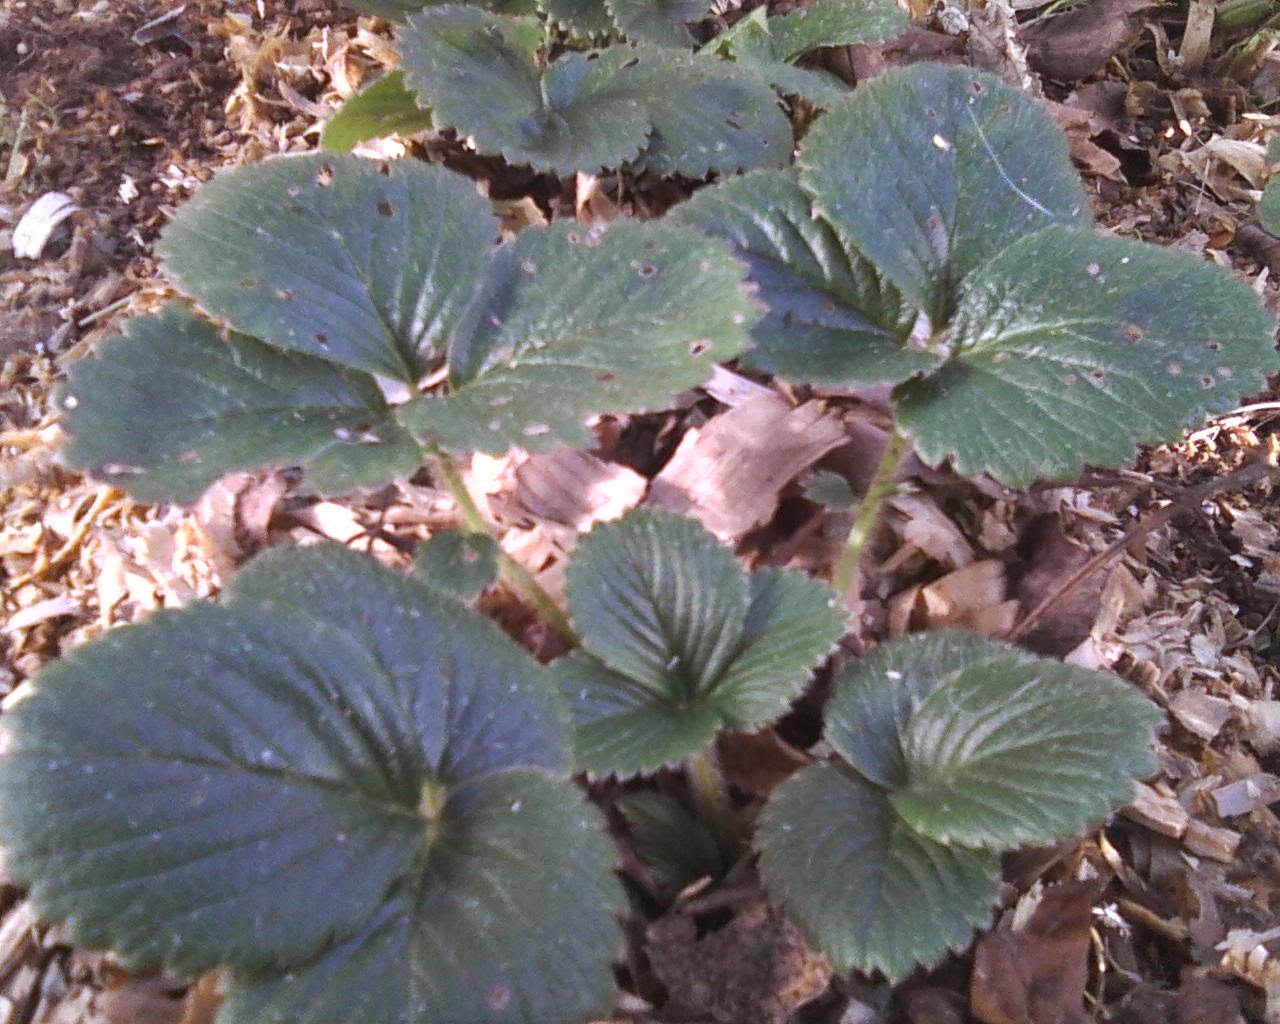
surfaces to set things on.  In between the rocks there are strawberry plants that produce berries each spring.  Sitting on the rocks there is a wire basket with a lining of moss where I plant geraniums or a large begonia.   Another rock has an old metal teapot with some petunias in it.  A large ornamental pepper plant growing in a plastic cauldron left over from a Halloween party sits on one and an old metal mailbox dresses up another with moss rose streaming out of it. 
To the side of the yard I have two large galvanized steel washtubs that hold herb gardens.  Rosemary, thyme, cilantro, bay leaves and oregano grow well there.  Beside them there is a dogwood tree that serves as a trellis for a Cherokee rose.  At the base of the tree where the roots have grown near the surface of the ground, I have dug a small spot for some wild violets.  They love the shade and the soft dirt between the tree roots.   Two trees at the other side of the yard have grown close together and there is a small pile of dirt between them.  I have planted cardinal vines here and they run up the trees decorating the trunks with their beautiful red flowers.    
My mom had an old wicker chair with a hole in the seat in which she had put a trash bag rolled down to fit the space and filled with dirt.  She planted brightly colored flowering annuals in it each summer and it was a beautiful centerpiece in her yard.  Nearby was the stump of a dead tree with the middle hollowed out a few inches down and refilled with dirt.  This held different types of mint which continue to come back year after year. 
Recently my husband has built several wooden manger-style planters on legs.  The planters are made in different lengths and depths and are painted or stained to blend into the area where they will sit.  They are deep enough to hold tulip or daffodil bulbs or even dahlias.  Another good idea for this type of container is to fill it with strawberry plants. 


Saturday, February 7, 2015

How to Save Money on Pet Supplies Without Shortchanging Your Pets


Our pets are important members of our families. We all want to keep them happy and healthy, but sometimes, that's not easy to do on a budget.  Here are a few ideas that have helped me save money and still give my pets what they need.

  As stewards of this earth and all that live in it, we have a responsibility to treat all God's creatures with kindness and compassion. We are to care for and protect the helpless and make wise decisions concerning the welfare of our own pets and any others that may come into our lives. The reward for this is a true and faithful friendship, gratitude and a love that will brighten even your worst day. 
 
  First of all, if your pet is not spayed or neutered this is something that should be taken care of as soon as possible. You may wonder how this can be a money saving tip. Actually this one thing alone can save you hundreds of dollars! Cats and dogs can have two litters each year for several years. When you consider the cost of food, flea treatments and worming alone you can have quite a bit invested in each litter. Finding suitable, loving homes for each of these babies is not always easy and keeping them all is not practical for most people. The total amount you will spend on a spay or neuter procedure will be well worth the money for you and will certainly be a better option for your pet.
 
  Check your newspaper for local spay / neuter clinics in your area. You can get the same services for a fraction of the usual cost at these clinics. Also look on the internet or call local vet offices to get information on any other discounts that may be available. Before you commit to a surgery, even at a lower cost, be sure that your pet will be supervised and will receive pain medication. Never subject your pet to unnecessary suffering to save money.
  
  There are discount stores that carry pet collars, leashes and toys. When I find a bargain on something that my dogs or cats will enjoy or may need in the near future I go ahead and get it at the discounted price and put it away until I need it. Collars break and toys get lost or chewed up. Your supply will come in handy sooner than you might think.
 
  My pets also enjoy home-made toys. Sock toys are a favorite among my dogs. When one of our socks gets a hole in it I tie a knot in the middle and it becomes a toy. I also use old socks to make bed buddies for my dogs.
 
  For my cats I have a scratching post made from a cut off tree limb with several forks. It is stuck down in the hole in a single square concrete block to hold it in place. From the forks I have hung a red piece of
cord with jingle bells tied to it, plastic milk lids attached to a string, and a plastic ball that swings in the breeze. Several of my cats love this! They also like to play with the plastic safety rings and the lids of milk containers.
 
  Look for homemade goody recipes for your pets at the library or on the internet. Often you can make their treats at home for a much lower cost than you can buy them. You can also use some types of leftovers for treats. For dogs: pizza crust; pie crust; a piece of pound cake; a meat skin or other chip; a hotdog cut into pieces. For cats: the leftovers from breakfast - eggs, bacon or sausage; plain yogurt or cottage cheese. There are other things suitable for your pets to enjoy as treats that won't be an extra expense for you. Be sure not to give your pets anything that is very salty or very sweet.
 
  Kitty litter can also be a big expense, especially if you have a multi-cat household like we do. Look for store brand clay litter, sometimes you can find a good sale price or a buy one get one free. Pine pellets are a good buy. They are a little more expensive than clay litter but they last much longer and absorb odor better than regular litter.
 
  For the last few months I have been taking the inexpensive route! I have a friend who does extreme couponing and she saves her newspapers for me. I tear the newspapers into strips and fill the litter boxes. Of course paper, even though it absorbs moisture, does not absorb odor so I sprinkle a little baking soda in the bottom of the box or crumble some dried peppermint leaves in before adding the paper.
 
  To dispose of the used paper litter I use shopping / grocery bags. Just dump it in and tie up the bag. This utilizes the bags you would probably have trashed anyway and eliminates the litter odor in your garbage can.
 
  Disinfecting wipes are convenient but they cost a little more than using plain paper towels dipped in bleach. I buy a few inexpensive rolls of paper towels and sale priced bleach. After emptying the shredded paper litter I wipe the bottom of the litter box to kill germs and prevent odor. It only takes a minute to dry and I have a sanitary litter box to refill and return to its usual spot.
 
  Flea treatments can be expensive but they are necessary. Fleas can make your pets miserable. They bite and make sores and the more the animal scratches to relieve the itching, the more irritated their skin becomes. One of my dogs is allergic to fleas and everywhere she gets bitten there will be a red puffy sore. I have found that adding a half cup of apple cider vinegar to her bath water kills many of the fleas and helps heal the sores.
 
  These are also good flea repellants - minced garlic added several times a week to a dog's food (NEVER GIVE GARLIC TO A CAT); any kind of citrus juice rubbed into your pet's fur; and essential oil of peppermint. You can make a spray by boiling peppermint leaves and straining the liquid off. When it has cooled to room temperature pour it into a spray bottle. Apply it to your pet's skin, part a small section of fur at a time and soak the area.
 
  In place of harmful and expensive chemicals to spray rugs, carpet and furniture for fleas try this: take several silver aluminum pie pans and fill with soapy water. Set them around the room before you go to bed and leave a light on so that there is a reflection in the pans. You will be amazed at the number of fleas that will jump in toward the glare and drown!
 
  For the treatment of ear mites there are two different methods that I have found to be effective.  One is to apply petroleum jelly or olive oil to the entire inside of your pet's ears being sure to cover all the skin completely. This will loosen the ear mites and allow you to wipe them out and it will also smother the hidden mites.
 
  You can also use apple cider vinegar to get rid of ear mites. Take a paper towel or a large cotton ball and dip it into a bowl of vinegar. Rub the inside of the ear and around the creases being careful not to touch the section near the ear drum. This will clean and disinfect the ear and kill any ear mites. You can let a drop or two run down into the inside of the ear to reach any mites that may be deeper than you can safely reach and gently massage the ears to help this spread as much as possible. Massaging will also help to comfort your pet and soothe the itching and irritation caused by the mites.
 
  Identify the items that you use most often to care for your pets and look around for bargains or acceptable substitutes to defray some of the cost. It is entirely possible to maintain your pets in a responsible and economic way. You can cut costs without sacrificing quality of care.


Friday, February 6, 2015

How to Start a Productive Raspberry Garden


 Raspberries are sweet, delicious and rich in Vitamin A, Vitamin C and antioxidants. Their bright color adds visual appeal to any dessert.

  The first raspberries I ever picked were growing on the side of a mountain in Tennessee. My grandfather had taken my sister and me to visit family there and we had stopped by the side of the road at a little spring coming out of the side of the mountain. The water came out of a hole about four feet off the ground and close by were some wild raspberry vines growing there in the dampness of the shaded rocks. The berries were dark red with a frosty glazed look. My first impression was how pretty they looked hanging there on the vine. Then we picked a few and ate them. Delicious with a unique flavor! This was something I wanted to see growing in our yard!

  Raspberries are not as common as some other types of berries. They grow wild in the Smokey Mountains but there are also many tame varieties that will do well in your back yard. Some varieties bear all summer and produce large quantities. Getting a row of raspberry sprouts started and maintaining them is fairly easy. They are hearty plants and need little more than sunshine, water and weeding to do well.

  There are several varieties of raspberries and three different colors: red, gold and black. The vines are much like blackberry but without the briers. The berries are soft when ripe and have a large core in the middle that pulls out as you remove the berries from the vine. The smell of the berries is light and sweet and they contain antioxidants which help fight off free radicals that can cause signs of aging and damage cells. The vitamins and minerals found in raspberries help keep blood sugar levels stable, promote a strong immune system and decrease the pain of arthritis.

  Raspberries grow well in most types of soil, even red clay which is mostly what we have here in the foothills of northeast Georgia. To start our first row of raspberry plants we ordered three Caroline, which is a red, ever-bearing raspberry and three Goldie, a yellow, ever-bearing variety. The first year they grew and did very well. The second year they began to produce abundantly and new little vines sprouted up here and there around the original stalks.

  These young vines were transplanted to form a new row. Using the same planting method as with the original raspberries we dug a hole 8 to 10 inches deep for each new vine leaving about two feet in between the plants to allow for growth, filled each hole with water and a sprinkle of plant food. Holding the plant upright in the middle of the hole we poured potting soil all the way around and covered this with the dirt that came out of the hole. We also put a layer of grass clippings around each plant for mulch to keep down weeds and help hold in moisture.

  Once the vines began to grow and spread out, they needed some support. I drove up two lengths of pvc pipe, one on each end and attached a length of pipe between them in front of the row of raspberries. As the plants grew tall and fuller I ran a cord across the front of the row just above the pipe rail to add more support and the larger plants are tied back to a fence behind the bed. Stakes made from pvc pipe, broom handles or something similar will work just as well to keep taller plants from breaking under the weight of their fruit.

  In the early winter after the second season it was time to the older canes. They were cut out and the new ones pruned back to about 2 feet from the ground. This was to promote healthier, more productive plants and a better yield in the next season. Our original 6 plants were now 12 plants and we had dug up numerous sprouts to share. We began to gather enough berries during a season to have plenty to snack on and some to put in the freezer for later.

  You can order raspberry plants online from a number of sites to start your own garden. They can also be purchased at many local farm and garden centers. Choose a variety that grows well in your particular climate zone by checking the map that is usually attached to the tag on each plant or is found
somewhere on the container. You will enjoy being able to pick your own berries and use them in cakes, pies, fruit salad or ice cream. They are a great snack to eat by themselves!

  Here is an idea for a gift that your gardening friends and family will love. Dig up the sprouts that will be coming up all around your original raspberry plants and put them in attractive individual containers. Allow them to grow in the container for several days before giving them as a gift to be sure that they will remain green and healthy. You might even include a small container of berries.

Growing Your Own Strawberries


  Strawberries are one of the most nutritious and delicious fruits that nature provides. Rich in Vitamin C and antioxidants strawberries are good for your heart, blood pressure and cholesterol. Strawberries are a great dessert or snack even by themselves. They are commonly used in a variety of cakes, pies, ice cream and salads.

  The strawberry plant thrives in most climates. However if the temperature in your location drops below the freezing mark frequently in the winter months you may need to protect your plants. If they are in containers, they can be put in a barn or other outside building. Or if you have too many to move you can cover them with hay and plastic or shade cloth.

  During the fall and winter months the strawberry leaves take on a reddish color. In the springtime they return to bright green and the plants will begin to produce runners. A new plant will grow from each

runner so if you want to increase the amount of plants you have be sure to keep the runners turned carefully in the direction that you want them to take root. If you want your existing plants to produce more fruit, clip the runners off. To keep your plants healthy make sure the crown of each plant is not buried in the dirt, which may cause them to rot.

  Also in the early spring you will begin to see white blooms on your plants and the strawberries will follow. It is exciting to watch the process of nature as it transforms a tiny stem into a leafy, green, fruit-bearing plant!
 
  Strawberries can be planted almost anywhere you want them. There are many varieties for you to choose from. You may want to do some research to find which variety is best suited to your area.

  They make beautiful hanging baskets for your porch or yard. You can plant them in terra cotta pots made with openings for planting around the sides of the pot. They can be planted in rows in your vegetable garden or in any type spot where you might plant flowers. Wooden barrels make a pretty addition to your yard and are a great place to grow strawberries.

  Some farmers who grow large fields of strawberries use raised beds. The rows are heaped several inches high with rich dirt and the plants are set out in a row along the top of the bed. Hay is usually placed around the plants with a sprinkling on top. This method not only helps the plants hold in moisture but also hides the red berries from birds looking for food.

  The soil should be kept loose and moist but not wet around your plants. It is always good to enrich your soil with compost. You will find that this will increase your yield of berries.

  Also keep in mind that a pretty pot of healthy strawberry plants makes a very nice gift. Not only will you be giving a living thing that will be enjoyed as it grows but also a gift that will produce juicy, delicious fruit as a bonus!

Thursday, February 5, 2015

Planting Flower Bulbs


Some flowers grow from seeds and some spread from the roots of the original plant. Others grow from bulbs. The bulbs remain even after the flower has shed its petals and the leaves have turned brown and withered. These bulbs will lie dormant throughout several seasons of the year and then at the appointed time they will produce leaves and bloom again. They require very little care and when planted in the right spot will multiply and produce beautiful flowers.

Bulbs  can be planted directly into the ground or in most any type of container with good drainage. Lay your bulbs out on the soil in the place that you have chosen to plant them. Arrange them in the design that you want, placed about 6 inches apart or if you want the flowers to appear in a bunch then plant the bulbs accordingly. Dig a hole about 3 inches deep, place the bulb in it with the roots down and fill in the hole with loose dirt.

  The area where you plant your bulbs should be at least partially sunny and well drained. Poor drainage can cause your bulbs to rot.

  Many beautiful flowers grow from bulbs, large blooms with tall stems, tiny delicate flowers with tall thin stems, heavy blooms with short sturdy stems. You have an endless variety of solid colors and stripes to choose from.

Spring bulbs include hyacinth, crocus, grape hyacinth, jonquils, daffodils, narcissus, tulips, and amaryllis. Summer dahlias, gladiolas, elephant ears, caladiums, canna and calla lilies and tiger lillies are all equally as beautiful and come in a number of colors and sizes. You can plant any or all of these in the same bed or planter. They can even be planted with a large bulb under and just behind a smaller one so that the blooms are side by side similar to a florist's arrangement.

  You can plant your bulbs directly in the ground in a flower bed or in a row in front of your house. They make a nice border beside a driveway or alongside a fence. Since they have a short blooming season and then are dormant for several months, they can be put almost anywhere without being in the way of grass cutting or yard trimming.

  A problem that we have to deal with in our area is moles. They love the taste of flower bulbs! Their tunnels run from one bulb to another as they eat their way around the flower garden. There are several mole deterrents on the market but the only thing that we have found that works is to plant our bulbs in flower pots or in beds built over layers of plastic so that the moles can't get through.

  Another idea for bulb planting is to use a large container. An old wheelbarrow, a utility sink, the tub of a goldfish pond or any other container you may have that would hold dirt can become a nice flower pot for your bulb garden. Any kind of flower pot that has proper drainage can be used.

  Most bulb flowers have a short blooming season and will begin to shed their petals after a week or so. Then the foliage will start to wilt and turn from green to yellow to brown and then fall off. Don't worry - your bulbs are only resting up for the next growing season. They will lie dormant until the time when they will bloom again next year. During this time some of them will begin to form new bulbs from the original one. In the fall, if they are big enough and can be separated without damaging either bulb, you can take the new bulb and plant it in it's own spot.

  During the dormant time you can plant other flowers over the bulbs being careful not to puncture the bulbs. Perennials will grow and bloom in opposite seasons from the bulbs and your flower bed will be filled with blooms from spring through fall.

  Enjoy the beauty that nature offers and the relaxation that comes from being outdoors.

Making Your Own Compost

Making compost serves two purposes – it utilizes items that would otherwise be taking up space in landfills and it provides a nutrient filled additive to your garden soil.  Adding compost increases the yield of fruits and vegetables.

  Adding compost to your soil enriches it and produces a greater yield of vegetables, fruit and more blooms in your flower garden. Compost adds nutrients back to the earth that may have been depleted through years of use. Rotating crops and adding compost will allow the soil to renew itself and regain its strength.

  There are a lot of things that are usually sent to the landfill that make excellent compost. First of all in your kitchen - used paper towels, old bread, table scraps, the empty cardboard paper towel roll, egg shells, tea bags, coffee grounds, paper bags, lint from your dryer, any leftover produce and vegetable or fruit peelings.

  From the bathroom - empty toilet paper rolls or facial wipes.

  In your living room - newspapers, envelopes from incoming mail, any junk mail (except on shiny paper) shredded to ensure that no personal information is accidentally compromised, sale papers or flyers.

  From your yard - leaves, grass clippings and wood shavings.

  Barn or pasture -- cow, horse or chicken manure are great natural readymade compost and can be added to your garden at any time. 

  Any large container with drainage will be a good place to store your compost. It can be made from any kind of material and can be kept anywhere that is convenient for you to add items to and should be reasonably close to your garden.

 When you have paper material to add it can be shredded or chunked in whole. As you add other items and as the rain soaks through the layers it will all begin to decompose. Any materials that are biodegradable in a reasonable amount of time can be added to your compost bin. You can occasionally take a shovel and turn your mixture and add any leaves or pine straw that may be collecting in your yard.

  The best time to add compost is in the late fall after the frost when it can be plowed into the soil and allowed to further decompose over the winter months. Your vegetables will be long gone by this time and even if you have a late crop such as turnip greens or collards you can add the compost after they have been harvested. If your area is small or you don't have access to a garden tractor, you can take a shovel and mix the compost in.

  A good mixture of compost improves the quality of the soil. Better soil produces more and better vegetables and fruits. Try making compost yourself keeping in mind that you are improving your world as you put garbage to a better use and prepare your soil to give you more food for your table.

Wednesday, February 4, 2015

Fennel - the Plant and Its Uses


 Shortly after we were married, my husband brought home a clump of green woody-textured stems with roots and planted it in the front yard close to the house. Our yard is mostly red clay so plants must be hearty to grow well here. The stems soon produced wispy greenery and in the springtime there were tiny yellow flowers that lay in a single layer across the top of each branch.
 
  The plant had an aroma similar to licorice and as it grew and the foliage filled out it became a very pretty addition to the yard. Each year it has made a larger and thicker circle of canes. We have enjoyed its beauty and the unusual smell that comes from the stem when it is broken off. We wondered for some time what kind of plant it might be but no one we asked seemed to know. Finally we searched the internet for plants matching a sketchy description and after reading several articles and looking at quite a few pictures, we found that our plant matched the description and image of an herb called fennel.
 
  We also did some research on what fennel can be used for and found some interesting facts. The entire fennel plant is edible, even the bulb which is the most nutritious part. Fennel seeds can be gathered after the blooms shed and are good for fish, sausage, and poultry. The stalks and leaves are used as ingredients for many Italian dishes. For a different and healthy salad idea cut up new, tender fennel stems and leaves and serve Italian style with olive oil, salt and lemon wedges.
. 


  Fennel also has medicinal value and has been successfully used to relieve discomforts in the intestines and stomach such as gas and cramps. Fennel contains potassium and fiber and is beneficial in reducing high blood pressure and high cholesterol. The fennel bulb produces Vitamin C which aids the immune system and is naturally antibacterial. Essential oil of fennel is gleaned from the plant's bulb and can be diluted and used as an ointment for skin irritations. It can be taken as a tea or as an herbal capsule which can be purchased from health food stores.
 
  For a unique addition to your herb garden look for fennel seeds or sprouts at your local garden center or feed and grain store. As it grows and spreads you can share with your friends and family who enjoy gardening.